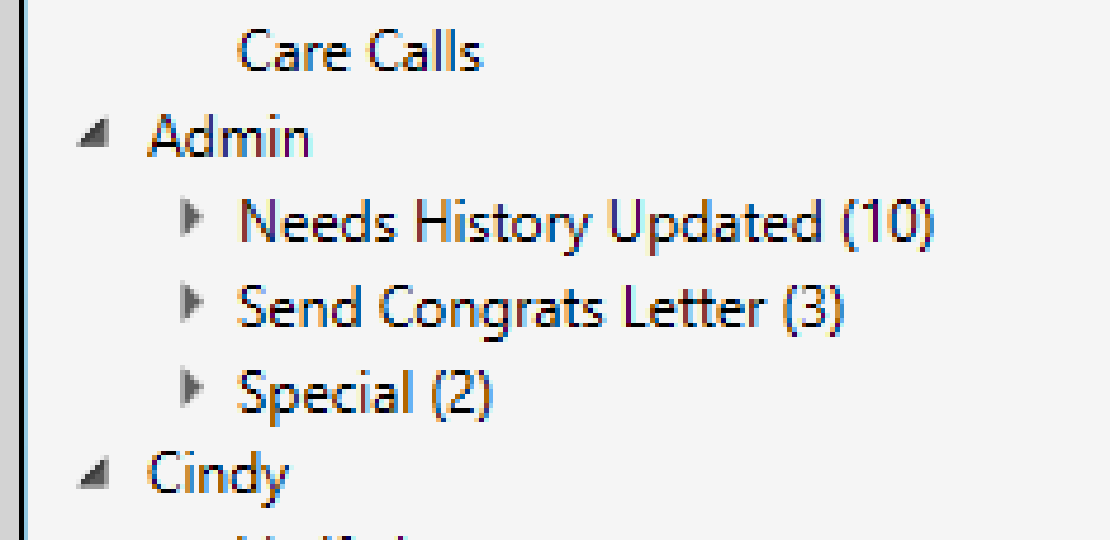
Stacks: The Digital Organizer
Published by Michelle Haupt on
By Derek Dohrman
Stacks are one of those things people tend to ignore until they fully understand what they do and how powerful they can be to a practice. Once an office understands stacks, they go all in on them. Let’s see if we can get you there, too!
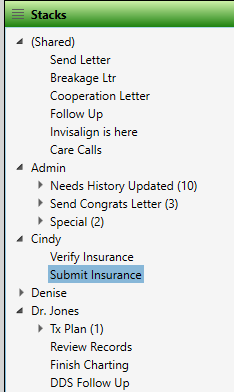
First, what is a stack? I like to think about stacks using the paper example. When you have paper charts in the office, you grab the chart and place it in your file organizer. The chart is there for you to come back to and finish something up at a later point in time. When you go paperless, you don’t have that chart sitting on your desk anymore, so stacks are simply a digital way to still have that chart there ready for follow up.
Stacks can be manually added to a folder, which means someone places a specific patient into the stack. Or stacks can be automated, meaning patients are added to a stack when an event happens. This is usually based on when a patient keeps an appointment or from a specific entry made in the treatment chart.
Some common examples I see of stacks follow the new patient process. Once a new patient exam is made, you can place the patient into a verify insurance stack. Once the exam is kept, you can place it into the TC’s stack to remember to send a letter out to the dentist. Finally, you can place the patient into the doctor’s stack to treatment plan.
A manual example of a stack is when the patient is being seen in the clinic and a letter needs to be sent to just that patient. Or the doctor needs a reminder to follow up with a patient to finish the treatment chart entry on them. Stacks are only limited by your imagination.
Creating Stacks
How do we create a stack? First, make sure you have Stacks on your Dashboard. If it’s not already there, you can add stacks to the Dashboard by going to the Widget Library, choose Stacks, and then select Dashboard. Before creating your stacks, it’s also a good idea to first update the settings. Click on the wrench in Stacks to open the settings. The View defaults to Myself and Shared, but I recommend changing that to All Operators with Stacks, or All Operators. Shared stacks is a group of stacks that multiple people work out of; for example, this could be care calls or letters to print. Whoever gets to it first does it.
To create a stack, right click on Shared or the User who needs the stack and choose Add Folder. Name the folder the reason for the stack. Examples include verify insurance, treatment plan, and care calls. It really can be whatever you need.
To manually add a patient to the stack, right click on the stack and choose Add Patient. Or even better, from the patient folder you are already in, go to Other Actions > Add to Stacks. Remember, you’re not adding the patient to a particular team member; you’re adding the patient to that team member’s stack. Be sure to click on the Arrow next to the team member’s name to expand their list and choose the specific stack.
Automating Stacks
Automating stacks brings out the true power of the stacks system. Automation uses the workflow system within Edge Cloud. Most workflows are started when something happens with an appointment. Going back to one of the first examples, let’s set up a Verify Insurance Stack Entry workflow when a new patient exam is made. Create your stack first, then go to Editors > Procedures.
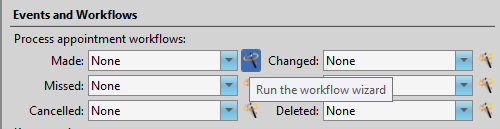
First, select your exam code. Then, in the Events and Workflows section, you see that a workflow can be fired when the appointment is made, missed, cancelled, changed, kept, or deleted. To the right of Made, click on the Workflow Wizard icon to create a new workflow. Select New Stack Entry, and choose the stack you want to add the patient into; in this case, Verify Insurance. Click Ok and you’re done. If you have a second or third exam code that needs the same workflow, you do not need to create the workflow again; it will be in the drop-down list.
Should you already have something happening when the new patient exam is made, like a welcome letter, you can combine multiple activities into the same workflow. That can be created in the Workflow editor.
Another example of automating stacks would be from a treatment chart entry. Let’s say the doctor wants a stack to review records or submit a treatment plan to Invisalign after a scan. If you have a drop-down list in the treatment chart, simply choosing an item in the list can fire the workflow and add the patient to the stack.
To automate a stack based on a treatment chart entry, go to Editors > Treatment Chart List. Find or create a new list to use. Choose the item in the list that will start the workflow, and click on the Workflow Wizard icon to the right of Workflow. Rinse and repeat for each item in the list as needed.
Although it’s not the topic of this article, you can also apply logic to these workflows when setting up a workflow in the Workflow editor. If you have multiple orthodontists, you can assign the patient to a stack based on their assigned orthodontist.
To wrap things up, stacks are a very powerful tool that every office should utilize. They are used in the internal processes you already have but they tend to simplify the process and save you from running reports or writing down the names of the patients you need to follow up with at a later time.
As a reminder, our Software Support Team is available to help you set up any of these processes. If you get stuck or have questions, feel free to call us at 800.346.4504 or email us at ortho2support@ortho2.com.
Derek Dohrman, Ortho2 Advanced Tech & Lead Trainer, has worked at Ortho2 for 20 years and has done countless on-site and remote trainings. He enjoys playing video and board games, traveling, and keeping up with new computer technology.
Questions, comments, or a great blog idea brewing? Email us — we're all ears.